
贝塞尔曲线,听着挺牛气一词,不过下面我们在做画图板的时候就用到贝塞尔绘直线,没用到绘制曲线的功能。如果会点PS的小伙伴会对贝塞尔曲线有更直观的理解。这篇博文的重点不在于如何用使用贝塞尔曲线,而是利用贝塞尔划线的功能来封装一个画图板。
画图板的截图如下,上面的白板就是我们的画图板,是自己封装好的一个UIView,下面会详细的介绍如何封装这个画图板,下面的控件用来控制我们画图板的属性以及Undo,Redo和保存功能。点击保存时会把绘制的图片保存到手机的相册中。下面是具体的实现方案。
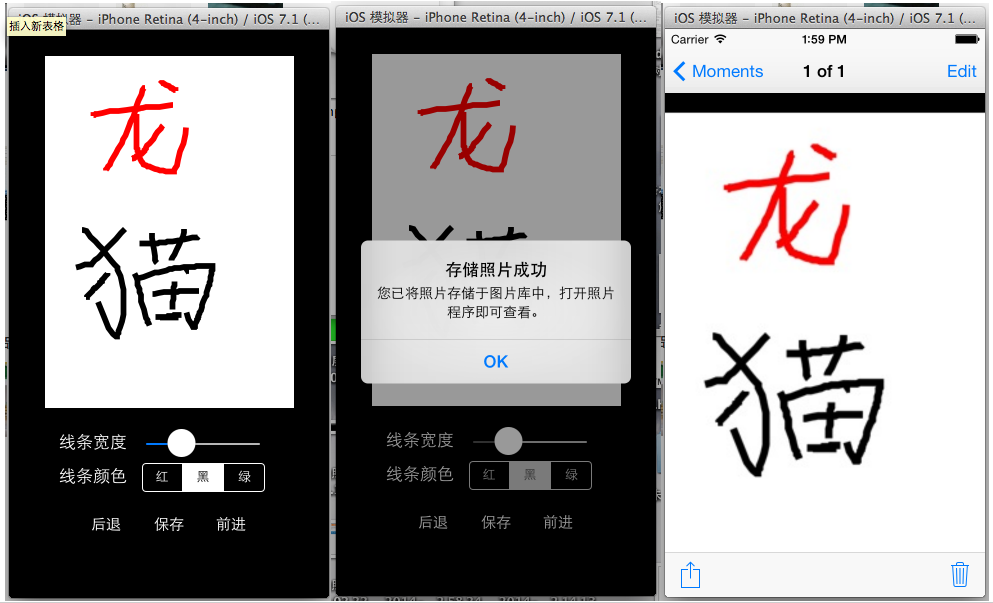
一.封装画图板
其实上面的白板就是一继承于UiView的一个子类,我们可以在这个子类中添加我们画图板相应的属性和方法,然后实例化成对象添加到ViewController中,当然为了省事添加白板的时候是通过storyboard来完成的,读者也可以自己实例化然后手动的添加到相应的ViewController中。
1.封装白板的第一步是新建一个UIView的子类MyView,然后添加相应的属性和方法。MyView.h中的代码如下,代码具体意思请参照注释
 1 #import <UIKit/UIKit.h>
 2
 3 @interface MyView : UIView
 4 //用来设置线条的颜色
 5 @property (nonatomic, strong) UIColor *color;
 6 //用来设置线条的宽度
 7 @property (nonatomic, assign) CGFloat lineWidth;
 8 //用来记录已有线条
 9 @property (nonatomic, strong) NSMutableArray *allLine;
10
11 //初始化相关参数
12 -(void)initMyView;
13 //unDo操作
14 -(void)backImage;
15 //reDo操作
16 -(void)forwardImage;
17
18 @end
2、上面的代码是对外的接口,有些属性我们是写在MyView.m的延展中以实现私有的目的,MyView延展部分如下:
1 @interface MyView()
2 //声明贝塞尔曲线
3 @property(nonatomic, strong) UIBezierPath *bezier;
4 //存储Undo出来的线条
5 @property(nonatomic, strong) NSMutableArray *cancleArray;
6 @end
3.下面的代码就是实现部分的代码了,会根据不同功能给出相应的说明
(1).初始化我们的白板,给线条指定默认颜色和宽度并且给相应的变量分配内存空间,初始化代码如下:
1 //进行一些初始化工作
2 -(void)initMyView
3 {
4     self.color = [UIColor redColor];
5     self.lineWidth = 1;
6     self.allLine = [NSMutableArray arrayWithCapacity:50];
7     self.cancleArray = [NSMutableArray arrayWithCapacity:50];
8 }
(2)Undo功能的封装,相当于两个栈,把显示的线条出栈,进入为不显示的线条栈中,每执行一次此操作显示线条栈中的元素会少一条而不显示线条栈中会多一条,大致就这个意思吧,代码如下:
 1 //UnDo操作
 2 -(void)backImage
 3 {
 4     if (self.allLine.count > 0)
 5     {
 6         int index = self.allLine.count - 1;
 7
 8         [self.cancleArray addObject:self.allLine[index]];
 9
10         [self.allLine removeObjectAtIndex:index];
11
12         [self setNeedsDisplay
13          ];
14     }
15 }
(3)Redo操作和Undo操作相反,从未显示栈中取出元素放入显示的栈中,代码中的栈我们是用数组来表示的,代码如下:
//ReDo操作
-(void)forwardImage
{
    if (self.cancleArray.count > 0)
    {
        int index = self.cancleArray.count - 1;

        [self.allLine addObject:self.cancleArray[index]];

        [self.cancleArray removeObjectAtIndex:index];

        [self setNeedsDisplay];
    }
}
(4)、当开始触摸时我们新建一个BezierPath,把触摸起点设置成BezierPath的起点,并把将要画出的线条以及线条对应的属性封装成字典添加到显示栈中,代码如下
 1 -(void)touchesBegan:(NSSet *)touches withEvent:(UIEvent *)event
 2 {
 3     //新建贝塞斯曲线
 4     self.bezier = [UIBezierPath bezierPath];
 5
 6     //获取触摸的点
 7     UITouch *myTouche = [touches anyObject];
 8     CGPoint point = [myTouche locationInView:self];
 9
10     //把刚触摸的点设置为bezier的起点
11     [self.bezier moveToPoint:point];
12
13     //把每条线存入字典中
14     NSMutableDictionary *tempDic = [[NSMutableDictionary alloc] initWithCapacity:3];
15     [tempDic setObject:self.color forKey:@"color"];
16     [tempDic setObject:[NSNumber numberWithFloat:self.lineWidth] forKey:@"lineWidth"];
17     [tempDic setObject:self.bezier forKey:@"line"];
18
19     //把线加入数组中
20     [self.allLine addObject:tempDic];
21
22 }
(5)当移动也就是划线的时候把点存储到BezierPath中,代码如下
 1 -(void)touchesMoved:(NSSet *)touches withEvent:(UIEvent *)event
 2 {
 3     UITouch *myTouche = [touches anyObject];
 4     CGPoint point = [myTouche locationInView:self];
 5
 6     [self.bezier addLineToPoint:point];
 7
 8     //重绘界面
 9     [self setNeedsDisplay];
10
11 }
(6)画出线条
 1 // Only override drawRect: if you perform custom drawing.
 2 // An empty implementation adversely affects performance during animation.
 3 - (void)drawRect:(CGRect)rect
 4 {
 5     //对之前的线的一个重绘过程
 6     for (int i = 0; i < self.allLine.count; i ++)
 7     {
 8         NSDictionary *tempDic = self.allLine[i];
 9         UIColor *color = tempDic[@"color"];
10         CGFloat width = [tempDic[@"lineWidth"] floatValue];
11         UIBezierPath *path = tempDic[@"line"];
12
13         [color setStroke];
14         [path setLineWidth:width];
15         [path stroke];
16     }
17
18 }
二.画图板的使用
上面是封装画图板要用到的全部代码,下面的代码就是如何在ViewController中使用我们的画图板了,如何实例化控件,以及控件的初始化,注册回调等在这就不做赘述了,下面给出了主要控件的回调方法
1、通过Slider来调节线条的宽度
1 //通过slider来设置线条的宽度
2 - (IBAction)sliderChange:(id)sender
3 {
4     self.myView.lineWidth = self.mySlider.value;
5 }
2、通过SegmentControl来设置线条的颜色
 1 /通过segmentControl来设置线条的颜色
 2 - (IBAction)tapSegment:(id)sender {
 3
 4     switch (self.mySegment.selectedSegmentIndex) {
 5         case 0:
 6             self.myView.color = [UIColor redColor];
 7             break;
 8         case 1:
 9             self.myView.color = [UIColor blackColor];
10             break;
11         case 2:
12             self.myView.color = [UIColor greenColor];
13             break;
14
15         default:
16             break;
17     }
18
19 }
3、undo和redo操作
 1 //Undo
 2 - (IBAction)tapBack:(id)sender {
 3     [self.myView backImage];
 4 }
 5
 6
 7 //Redo操作
 8 - (IBAction)tapGo:(id)sender {
 9     [self.myView forwardImage];
10 }
4.保存操作,也许下面的保存操作在处理方式上略显笨拙,如有更好的解决方案请留言。 保存的时候我是先截了个屏,然后把白板进行切割,把切割后图片存入到相册中,代码如下:
 1 //把画的图保存到相册
 2 - (IBAction)tapSave:(id)sender {
 3     //截屏
 4     UIGraphicsBeginImageContext(self.view.bounds.size);
 5     [self.view.layer renderInContext:UIGraphicsGetCurrentContext()];
 6     UIImage *uiImage = UIGraphicsGetImageFromCurrentImageContext();
 7     UIGraphicsEndImageContext();
 8
 9
10     //截取画图版部分
11     CGImageRef sourceImageRef = [uiImage CGImage];
12     CGImageRef newImageRef = CGImageCreateWithImageInRect(sourceImageRef, CGRectMake(36, 6, 249, 352));
13     UIImage *newImage = [UIImage imageWithCGImage:newImageRef];
14
15     //把截的屏保存到相册
16     UIImageWriteToSavedPhotosAlbum(newImage , nil, nil, nil);
17
18     //给个保存成功的反馈
19     UIAlertView *alert = [[UIAlertView alloc] initWithTitle:@"存储照片成功"
20                                                     message:@"您已将照片存储于图片库中,打开照片程序即可查看。"
21                                                    delegate:self
22                                           cancelButtonTitle:@"OK"
23                                           otherButtonTitles:nil];
24     [alert show];
25
26 }
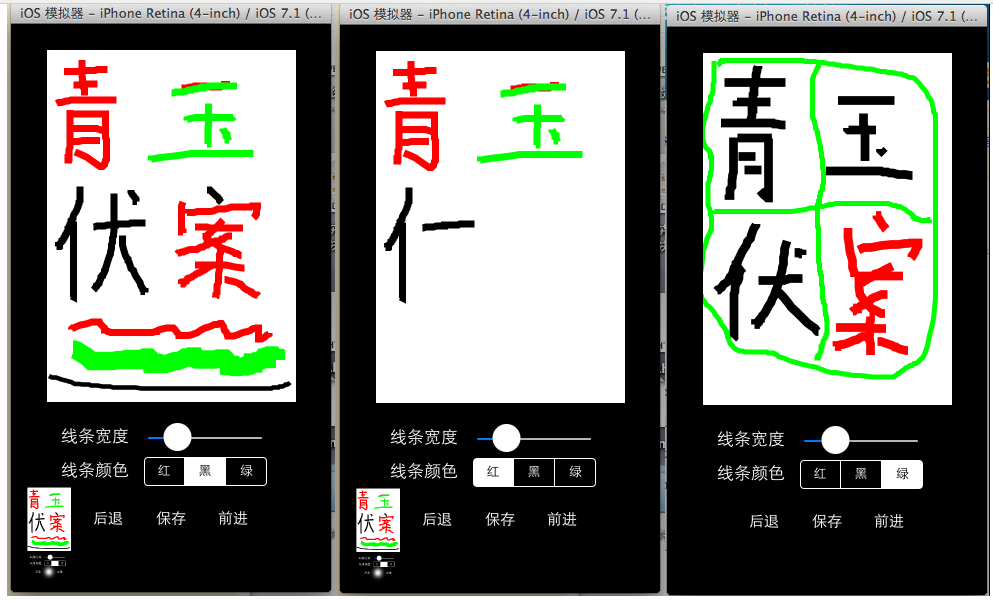
以上就是本画图板的主要代码了,有不足之处还望批评指正。转载请注明出处。在本文结束时在来几张截图吧(demo下载地址:http://www.pgyer.com/LTQ8):
总浏览量
9,608次
博客园历史 4,743 腾讯云 2,106 阿里云 2,758 本站新增 1
本站阅读按浏览器在 15 分钟内去重;禁用浏览器存储时按网络地址去重。推荐按浏览器一年内去重。仅使用站内随机标识,不采集浏览器指纹。
分享这篇文章
原创内容,未经授权禁止转载。
欢迎分享原文链接。除另有署名或许可说明外,本站原创文章的著作权由青玉伏案享有;未经书面授权,禁止整篇转载、复制发布、改编传播或建立内容镜像。
版权与使用条款
- 依法属于合理使用、法定许可等情形的,按法律规定执行;引用时应注明作者、作品名称和原文链接,不得歪曲、篡改或隐去署名。
- 经书面授权使用的,请遵守约定的用途、范围与署名要求。注明出处不等同于已经取得整篇转载或其他使用授权。
- 第三方图片、引用内容和书籍封面等权利归相应权利人所有;开源代码与 Demo 按其各自许可证使用,本声明不改变已有许可。
- 本声明参考《中华人民共和国著作权法》第十条、第二十四条、第五十二条等。对侵权使用,权利人保留依法要求停止侵害并追究相应责任的权利。
大神可以把代码发给我一份吗,邮箱3195656929@qq.com,谢谢了
很不错、mark
博主能发这个画板的demo学习下么 439826207@qq.com 谢谢了
@
YuFly
Demo找不到了~我现在也没有~